

PRO only: a group’s This repo scope is a Pro feature.
The Global scope is available on every plan.
Groups are purely for organizing the display, and they’re stored only inside the app.
They have no effect on the git repository or the remote.
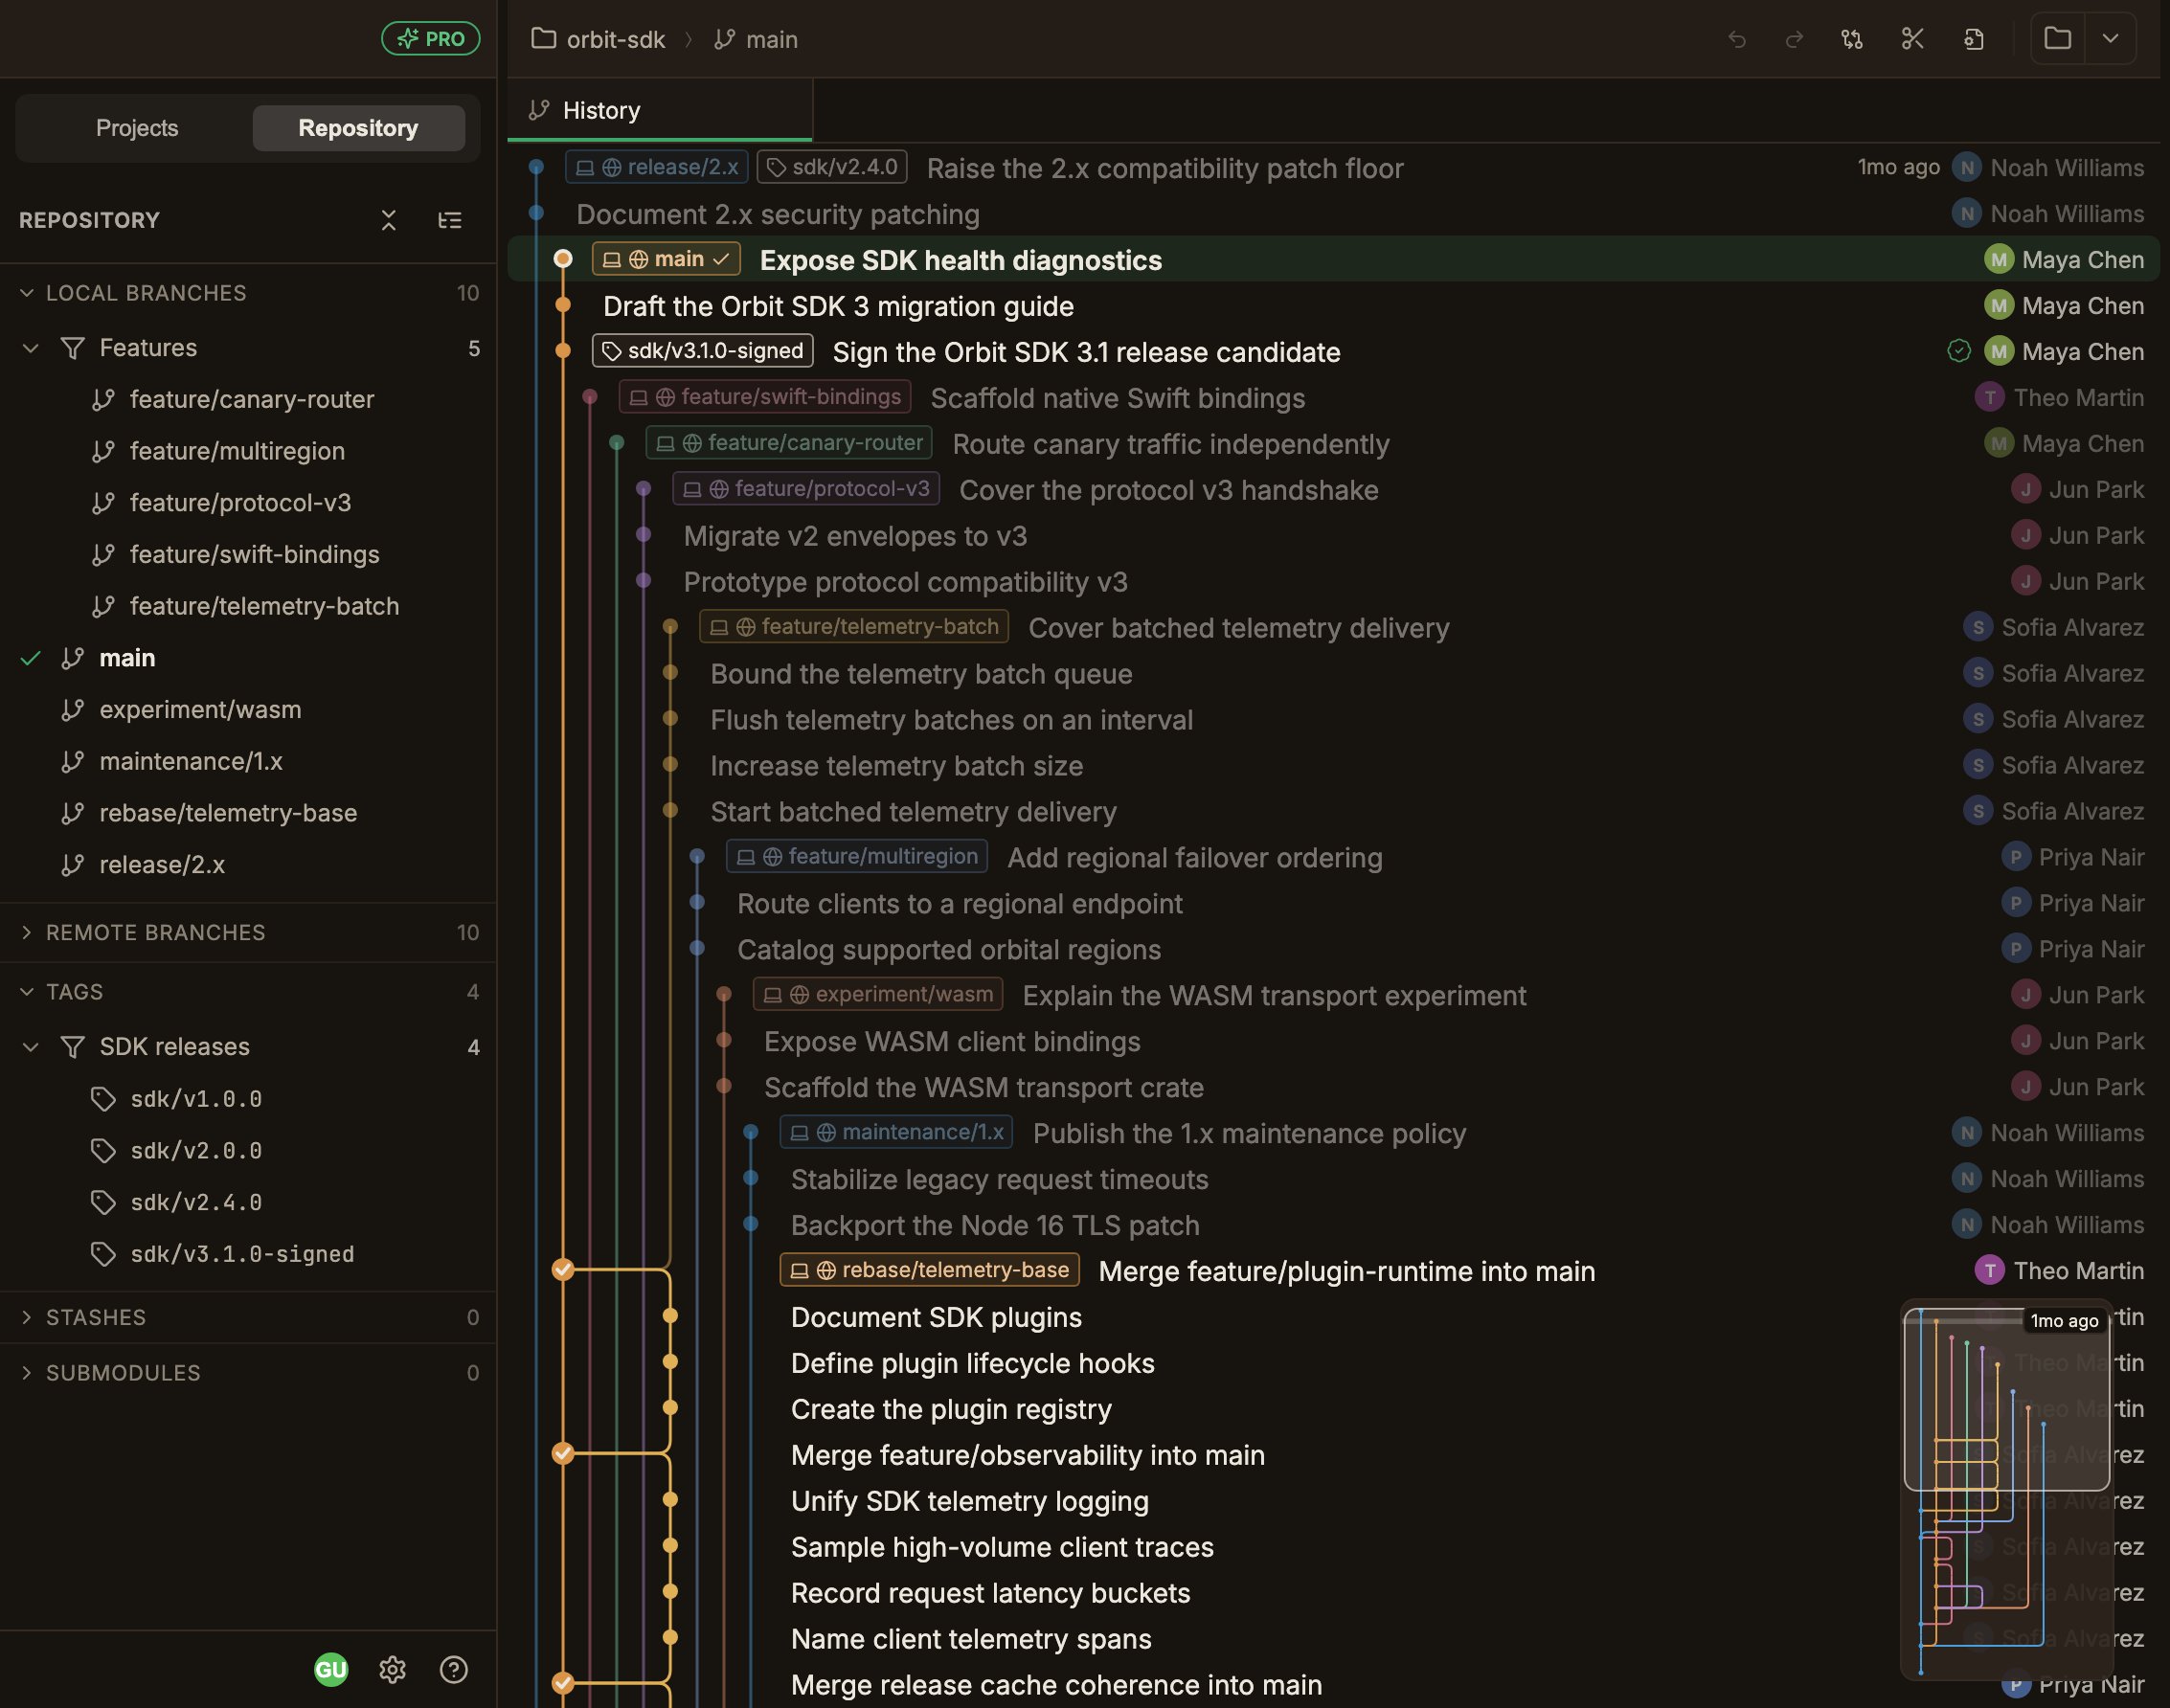
Creating a group
1
Open a new group from the section header
Click the + button (New group) that appears when you hover over the section header.
If there’s already at least one group, a gear button (Manage groups) also appears to its left.
2
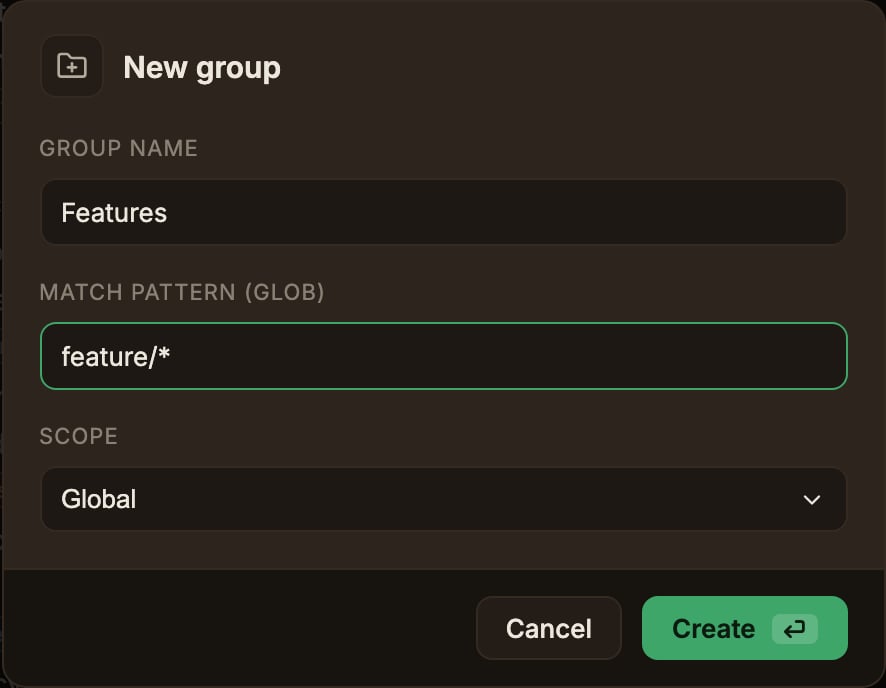
Enter a name and match pattern
Enter a Group name (e.g.
Releases) and a Match pattern (glob) (e.g. release/*).3
Choose a scope and create
In Scope, Global (default) applies to every repository, and This repo applies only to the current one.
Click Create and refs matching the pattern are collected immediately.
Match pattern (glob)
The pattern must match the ref’s name in full, and matching is case-insensitive.* matches a string of any length (including /), and ? matches a single character.
What gets compared differs by section.
- Local Branches compares the branch name (
feature/login) - Remote Branches compares the full name including the remote (
origin/feature/login) - Tags compares the tag name (
v1.2.0)
A ref belongs to only one group.
If it matches multiple patterns, the first group checked wins, in the order this-repo-only groups → global groups; within the same scope, list order applies.
Placing narrower patterns higher up makes the outcome easier to predict.
Working with groups
- A group header shows a collapse arrow, the group name, and the number of matches. Click the header to collapse or expand it.
- Right-clicking the header opens a menu with Edit group… / Move up / Move down / Delete. Editing lets you change the name, pattern, and scope, all at once.
- Clicking Manage groups in the section header lets you reorder, edit, or delete every group in that section from one screen. Reordering only moves groups within the same scope.
- A group with zero matches keeps showing a count of 0.