

How conflicts show up
Conflict toast
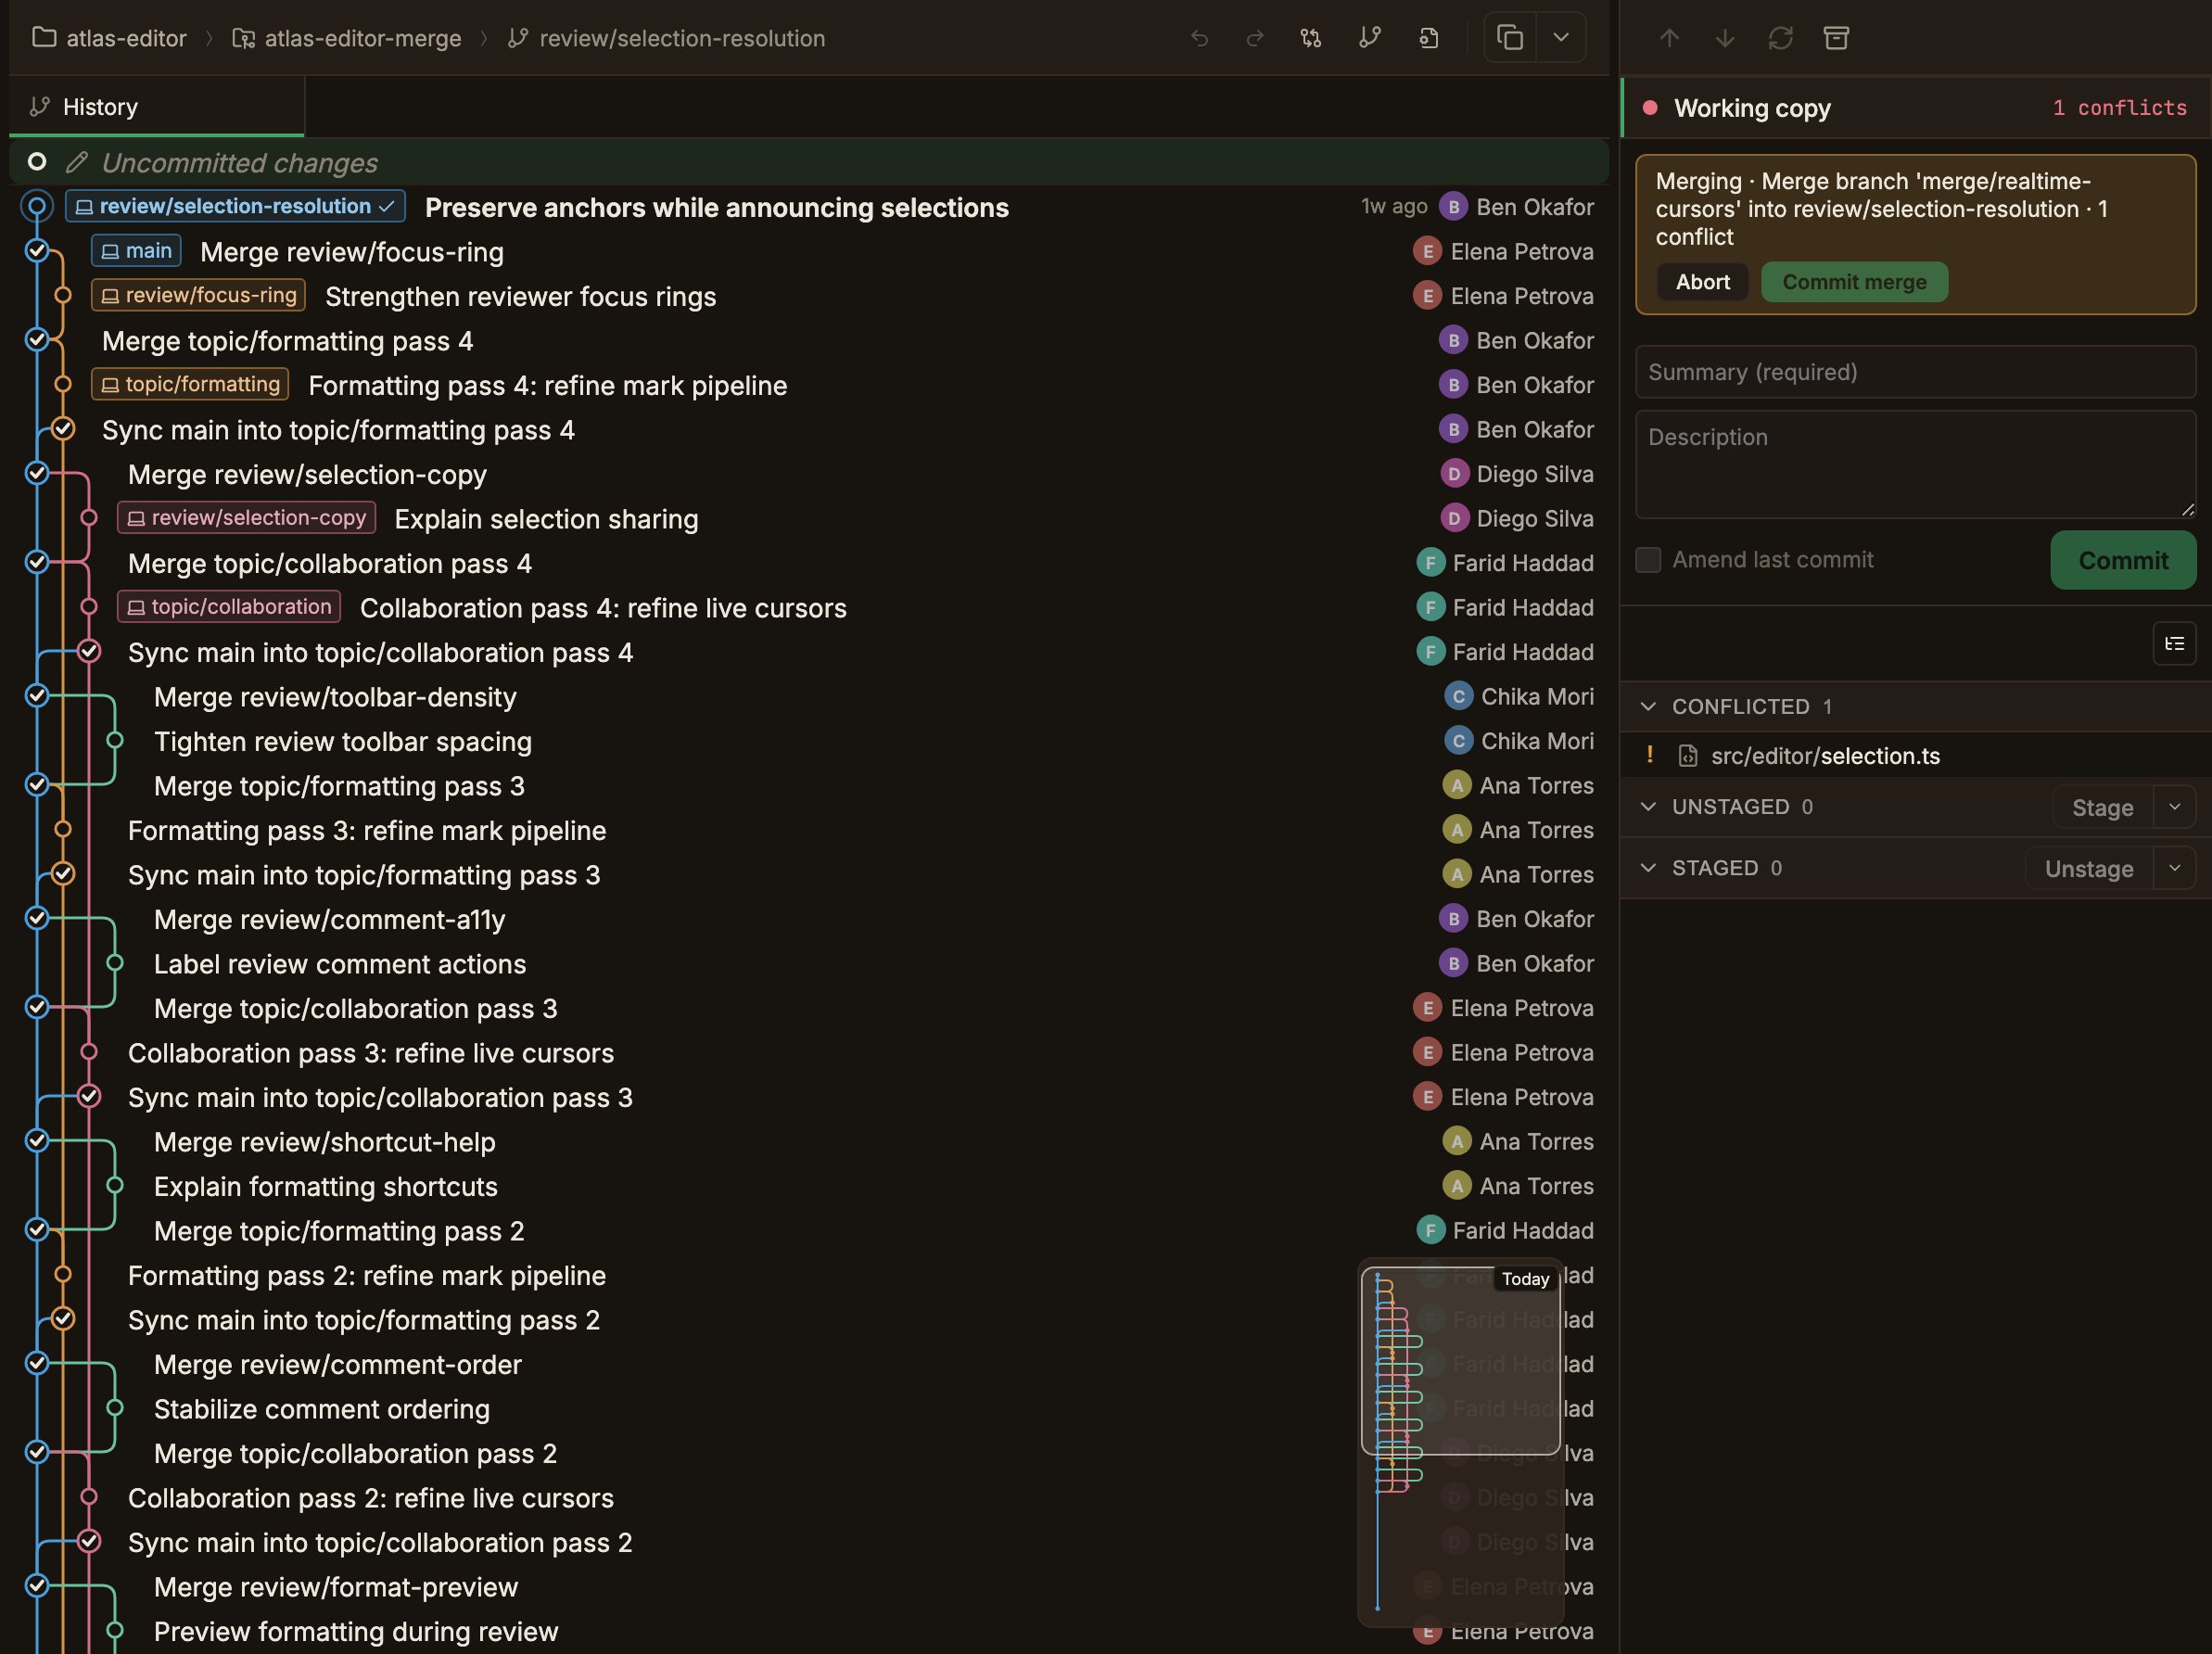
A notification tells you there are merge conflicts and to resolve them in the Working Copy panel.
Top banner
The number of remaining conflicts and the Abort / Continue buttons appear at the top of the Working copy panel.
It changes to Merging / Cherry-picking / Reverting / Rebasing depending on the operation.
Conflicted files section
A separate Conflicted section appears above the staging sections.
Where it happens
It can happen during merge, rebase, cherry-pick, revert, pull (merge strategy), and applying a stash.
Resolving in the merge editor
Click a conflicted file and the three-pane merge editor opens. Read-only Ours (current) and Theirs (incoming) sit side by side at the top, with the editable Result (editable) panel below.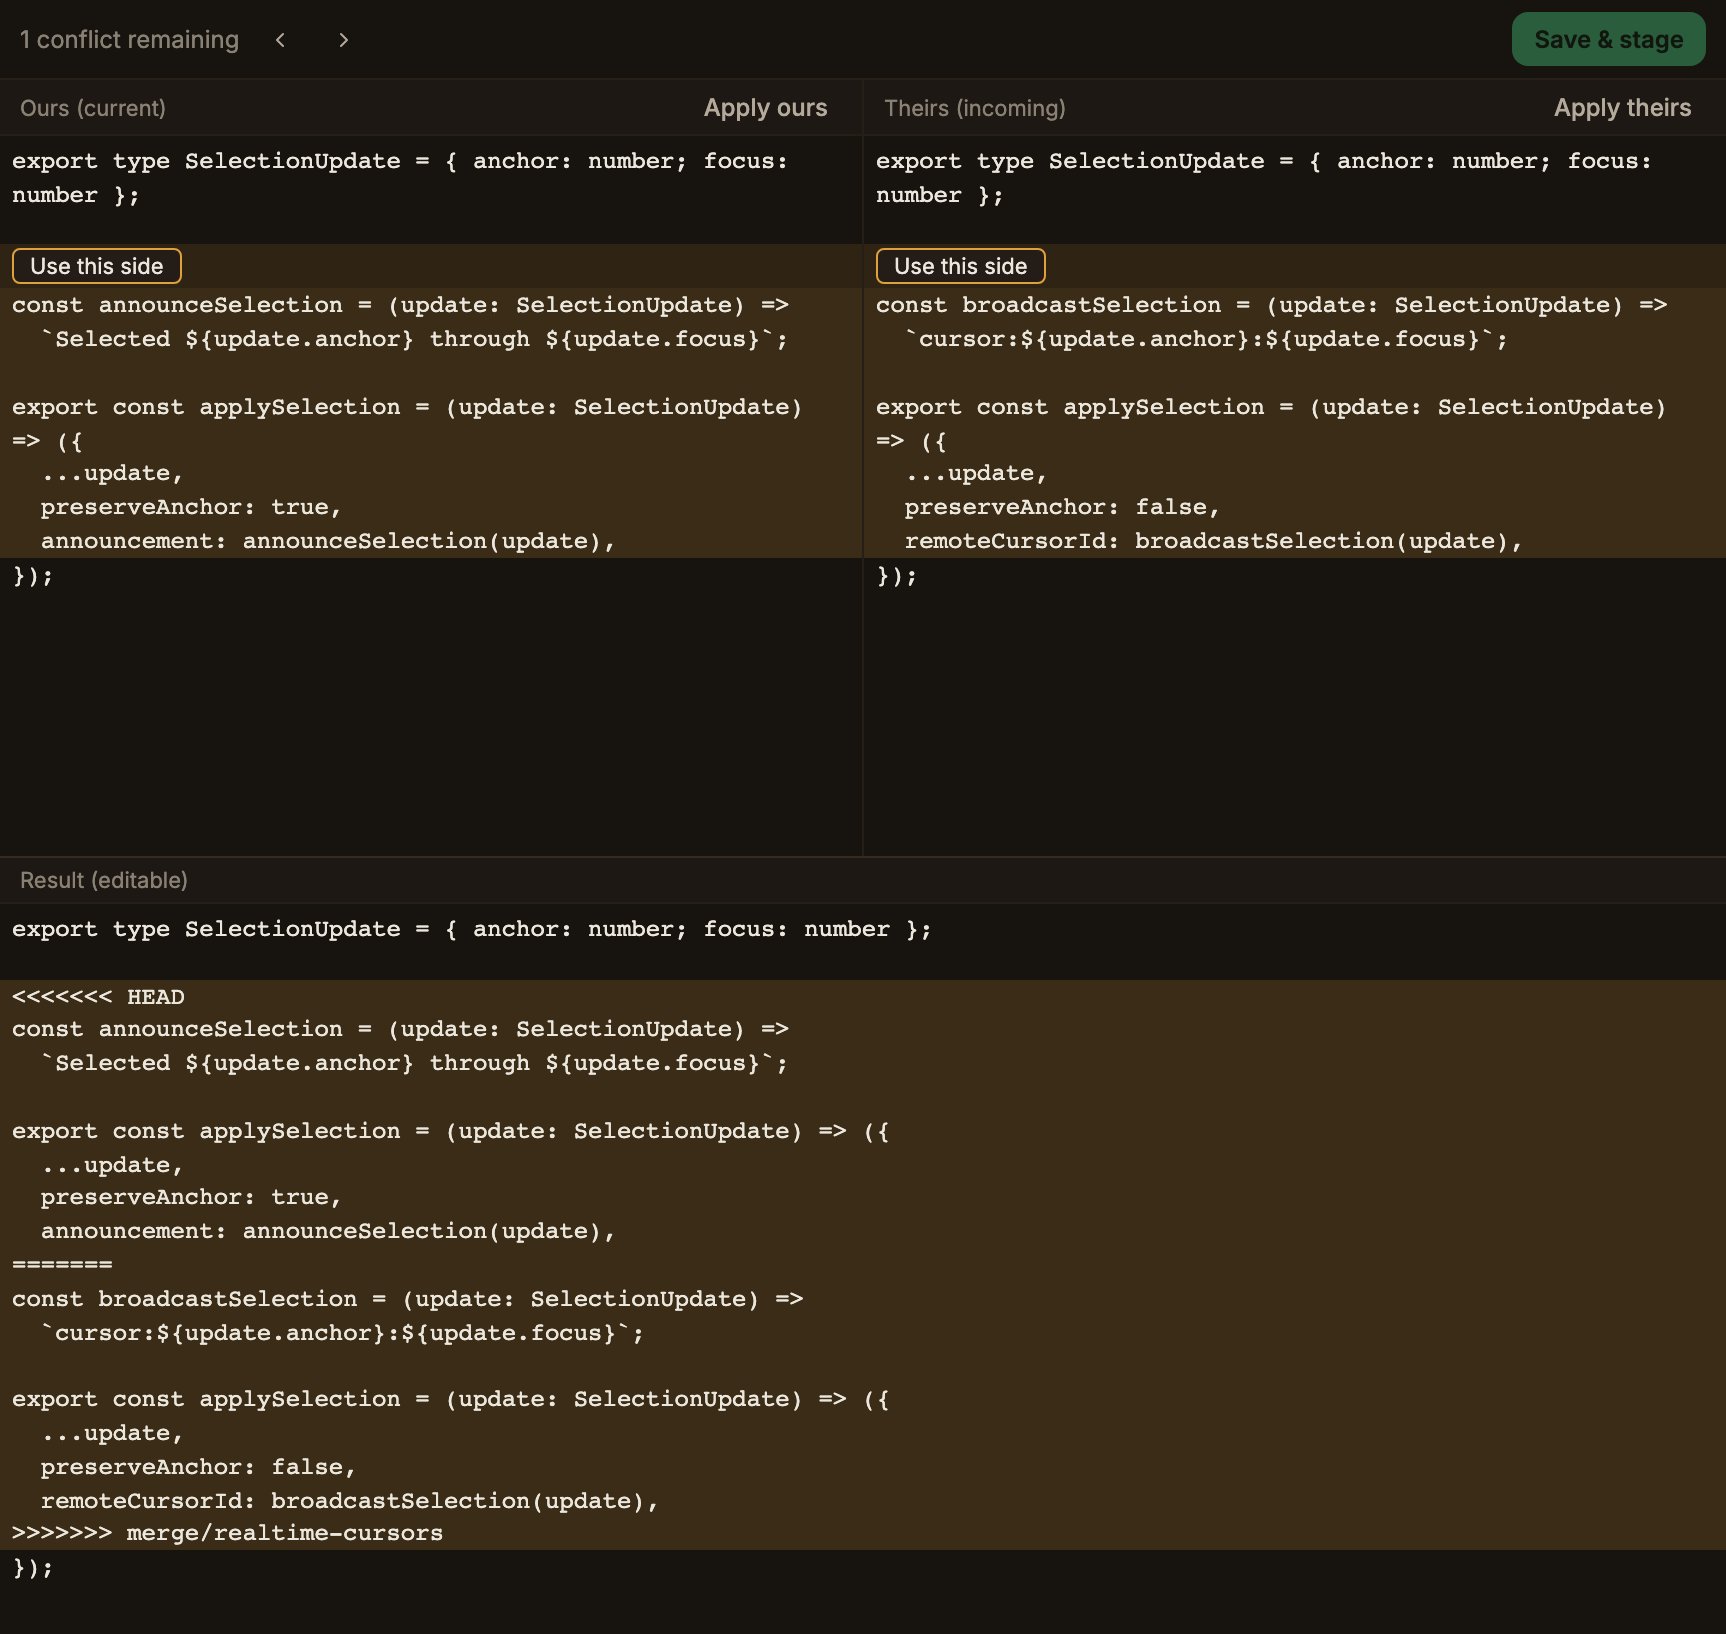
1
Locate the conflicts
Conflicting lines are highlighted in amber.
Use the toolbar’s Previous conflict / Next conflict buttons to move between them. All three panels scroll together, and the conflicts remaining counter shows your progress.
2
Adopt one section at a time
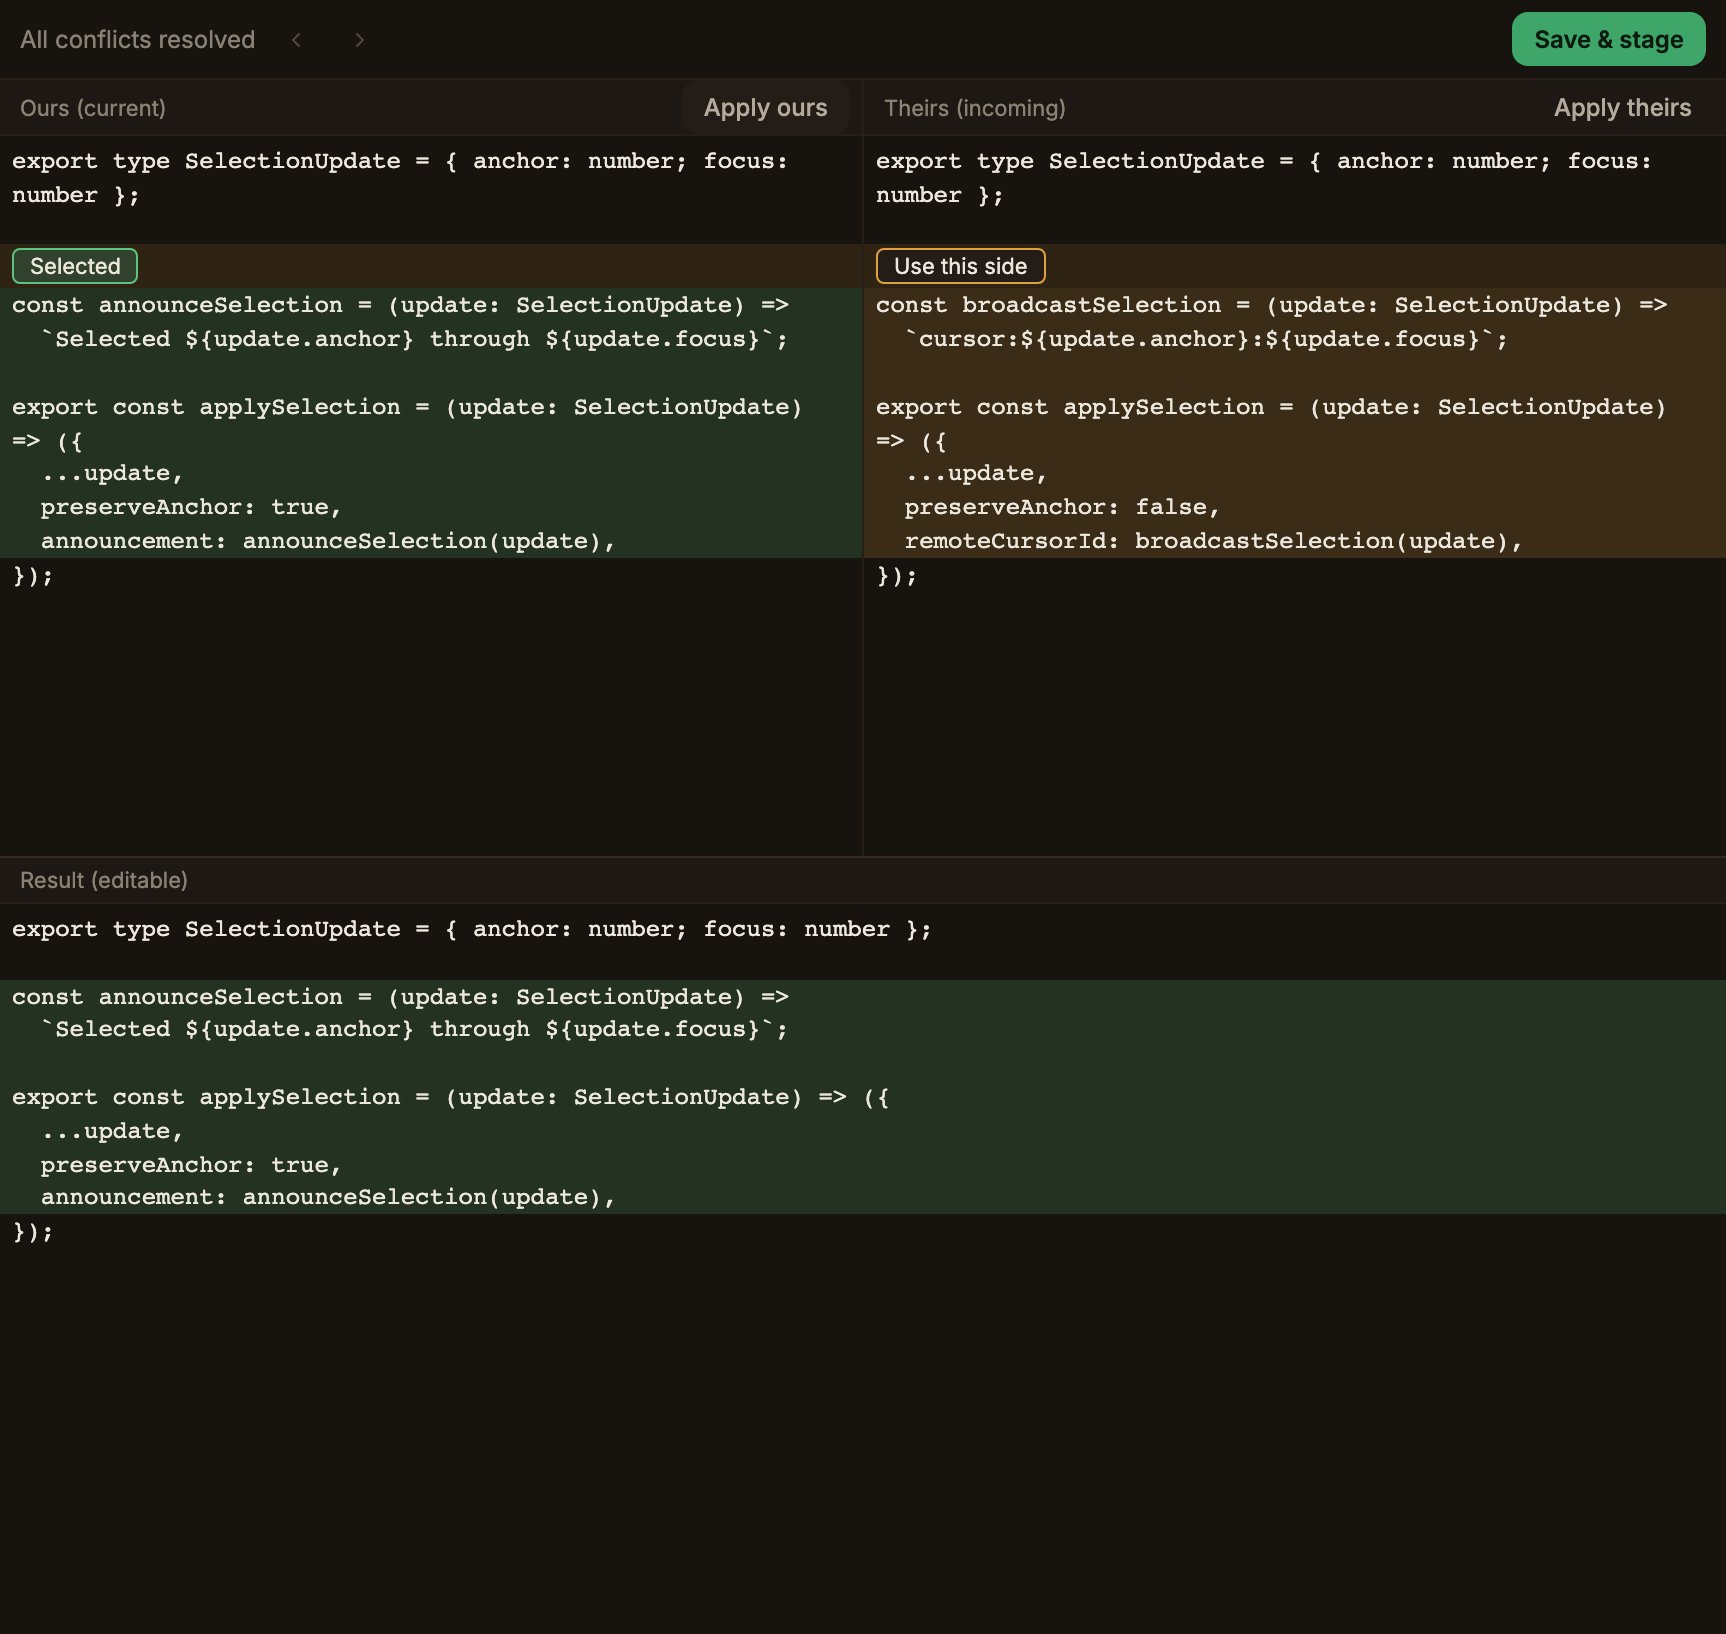
In each section, click Use this side and its content flows into the Result panel, with the button changing to Selected.
Turn on both sides and they merge in order: Ours first, then Theirs.
In the Result panel, unresolved sections are amber and resolved ones are green.
3
Adopt one side for the whole file
Use Apply ours or Apply theirs in the panel header to adopt all conflicts in the file at once.
4
Edit directly
You can edit the Result panel freely.
Delete the conflict markers (
<<<<<<< and so on) and that section counts as resolved.5
Save & stage
Once every conflict is gone, Save & stage becomes active.
Click it and the file is staged, and you move to the next conflicted file automatically.
Modify/delete conflicts
When one side deletes a file and the other modifies it (modify/delete), the three-pane editor is replaced by an explanatory message and Delete / Keep file buttons, with the surviving side’s content shown read-only below.Using an external merge tool
Choose a tool in Merge tool under Settings → ParalleLane → Git, and you can open the current conflicted file in that tool from the wrench icon in the merge tab header. The list is populated with the tools thatgit mergetool --tool-help reports, and entries that aren’t installed show (not installed).
Continue or abort once you are done
Continue / Commit merge
It becomes active once the remaining conflict count reaches 0.
Merge creates a merge commit; cherry-pick, revert, and rebase move on to the next step.
Abort
After a confirmation dialog, it cancels the whole operation and returns to the previous state.
Anything you resolved so far is lost.
Rebase can stop at every commit, so a conflict can happen again on the next commit after you click Continue.
To skip this commit, use Skip in the banner (it only appears during a rebase).