

Cloning a repository
1
Open the clone modal
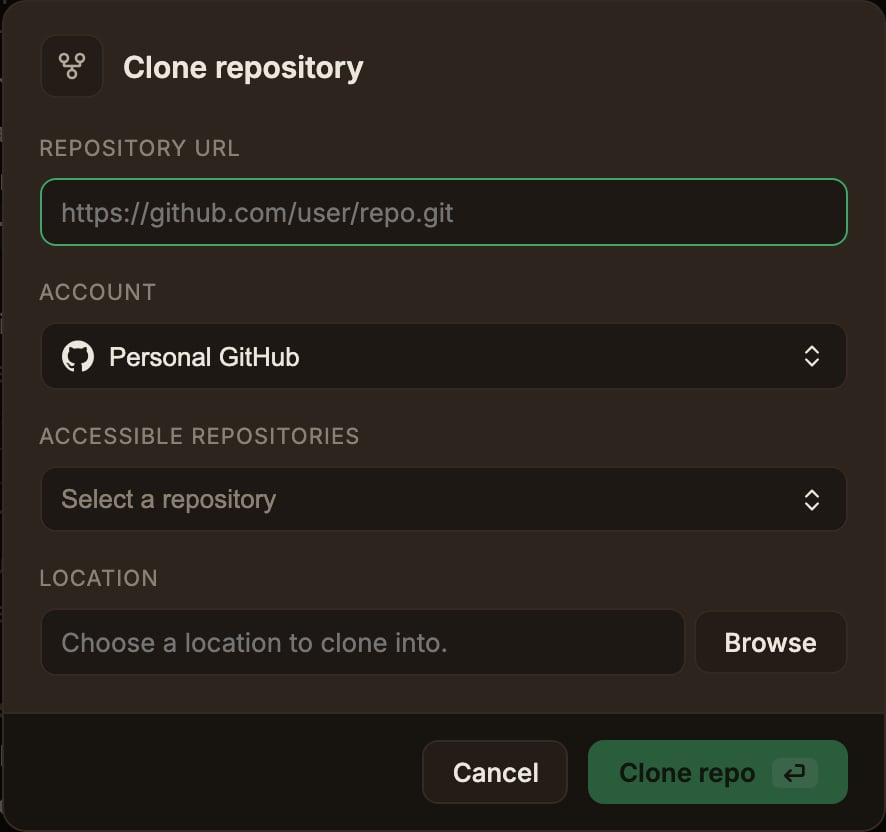
In the sidebar, select Add repository → Open Remote Project.
When the modal opens, it loads the list of accessible repositories.
2
Choose an account
In the Account dropdown, choose the account to clone with.
The default is the global default account; changing it reloads the repository list.
Private repositories are cloned using the selected account’s credentials.
The account used for the clone is automatically linked to that repository, and is used for pushing, pulling, and committing afterward.
3
Specify the repository to clone
- Pick from the list by choosing one from the Accessible repositories dropdown, which fills in the clone URL automatically. Repositories already registered show an Added badge and appear disabled.
- Enter a URL directly by pasting the address into the Repository URL field.
The URL always takes precedence.
If you pick from the list and then edit the URL by hand, the list selection is cleared and the repository is cloned from the URL you typed.
4
Confirm the destination folder
Check the parent folder under Location, or change it with Browse.
The actual clone path is
<location>/<repo-name>.5
Run the clone
Click Clone repo.
When it finishes, the new repository is registered and opens automatically.
Clone progress
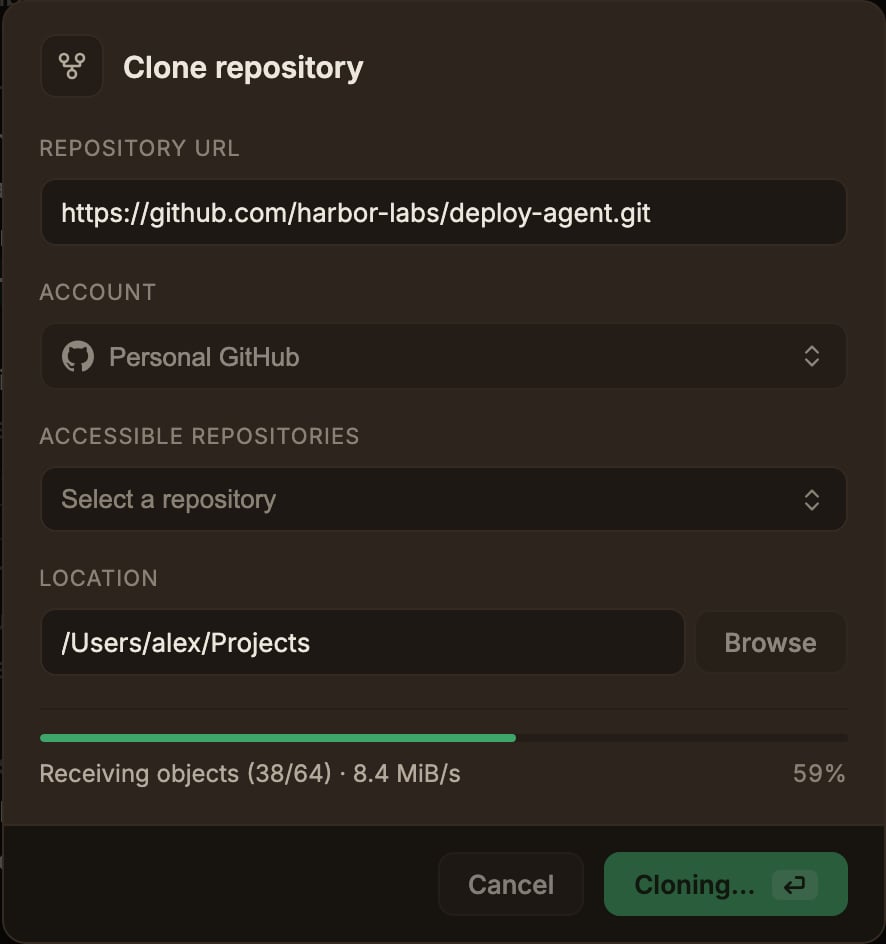
(processed/total) appears next to the stage name, and transfer speed is added during Receiving objects.
The progress bar shows the progress of the current stage.
It restarts at 0% when the stage changes, and depending on the repository, some stages may be skipped.
Clone uses a different timeout than other remote operations.
It continues for up to 24 hours as long as progress output keeps arriving, and stops only when 300 seconds pass with no progress reported.
Common situations
The repository list is empty
The repository list is empty
The list can’t be populated if you have no account or your token has expired.
Add an account or re-authenticate in Settings → ParalleLane → Accounts.
You can still clone by entering the URL directly.If the list fails to load, the error the remote returned appears below the dropdown as-is (for example,
HTTP 401 Unauthorized). If the account is connected but has no accessible repositories, a plain message is shown.The destination folder already exists
The destination folder already exists
If the
<location>/<repo-name> folder already exists, the clone is stopped before it starts.
Change the location or clean up the existing folder.The repository is already registered
The repository is already registered
The check is based on host, owner, and repository name, so the SSH and HTTPS addresses of the same repository are recognized as identical.
This check doesn’t apply when you enter a URL directly.
Cloning the same repository to a different location registers it again as a separate local copy.
The clone fails with an authentication error
The clone fails with an authentication error
Check that the selected account has access, and re-check your credentials in Settings → ParalleLane → Accounts.