

Creating a stash
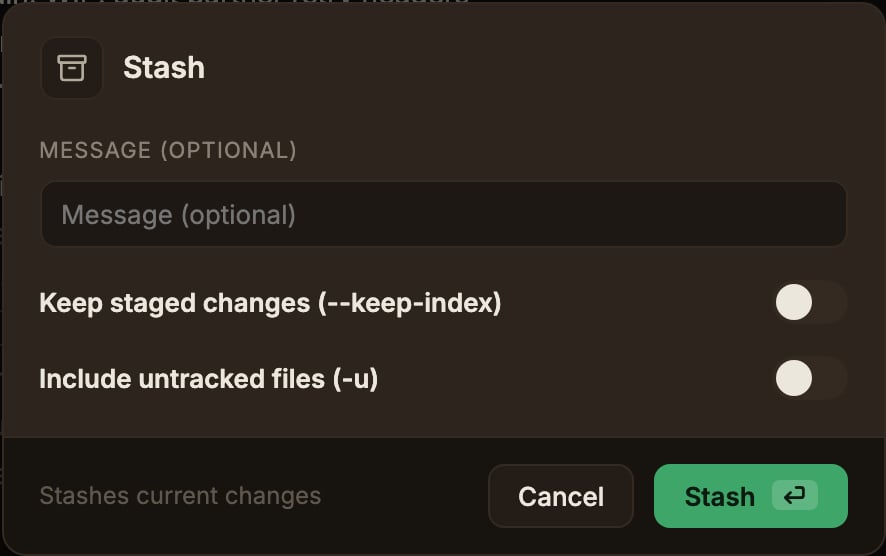
Click the Stash button in the right sidebar toolbar (disabled when the Working copy is clean). The modal sets the following options:- Message (optional) is a description to help you recognize it later.
- Keep staged changes (—keep-index) leaves staged changes in the Working copy. Use this when you only want to build or test what you’ve staged.
- Include untracked files (-u) also saves new files that aren’t tracked yet.
- Files to stash lists changed files as checkboxes, all selected by default. Uncheck one and it stays in the Working copy (a partial stash).
Renamed files appear as a single
old-name → new-name entry; selecting it stashes the deletion and the addition together.
Turn off Include untracked files and untracked files disappear from the list.
Uncheck everything and the Stash button is disabled; no empty stash is created.Applying a stash
Right-click an item in the Stashes section of the left repository panel and choose Apply stash to open the modal. The Delete stash after applying option decides whether it’s removed from the list; a stash is kept when a conflict occurs.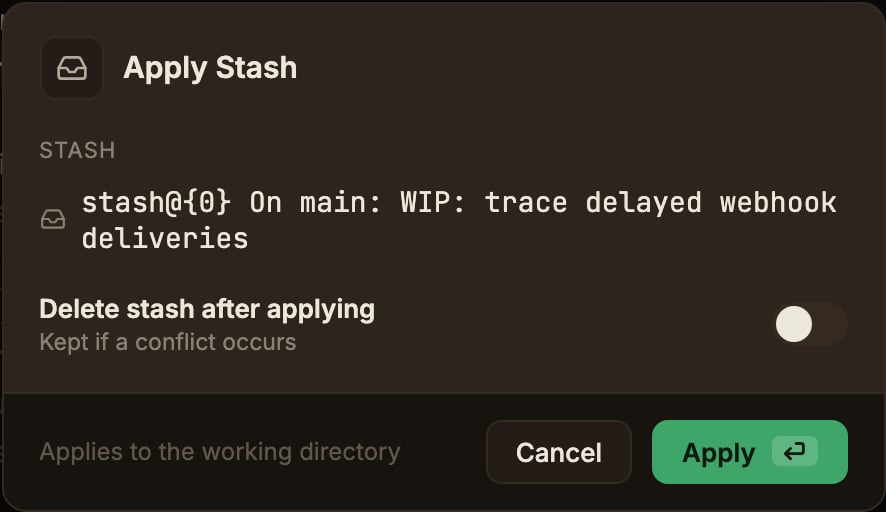
When applying causes a conflict
Conflicted files collect in the Conflicted section of the Working copy panel. The resolution steps are the same as in Resolving merge conflicts.However,
git stash apply doesn’t leave an “in progress” state. There’s no conflict banner and no continue-or-abort flow.
Resolve the conflict, stage it, and commit as usual.
The stash stays in the list, so you can apply it again.Deleting a stash
Right-click a stash entry, choose Delete, confirmstash@{N}: <message>, and click Delete.
Stashes in the graph
A stash is a separate node branching off the base commit at the time it was created, drawn directly above the base commit. Both the node and the connecting line are dashed, showing it isn’t part of regular history, and its title takes the formstash@{N}: <message>.
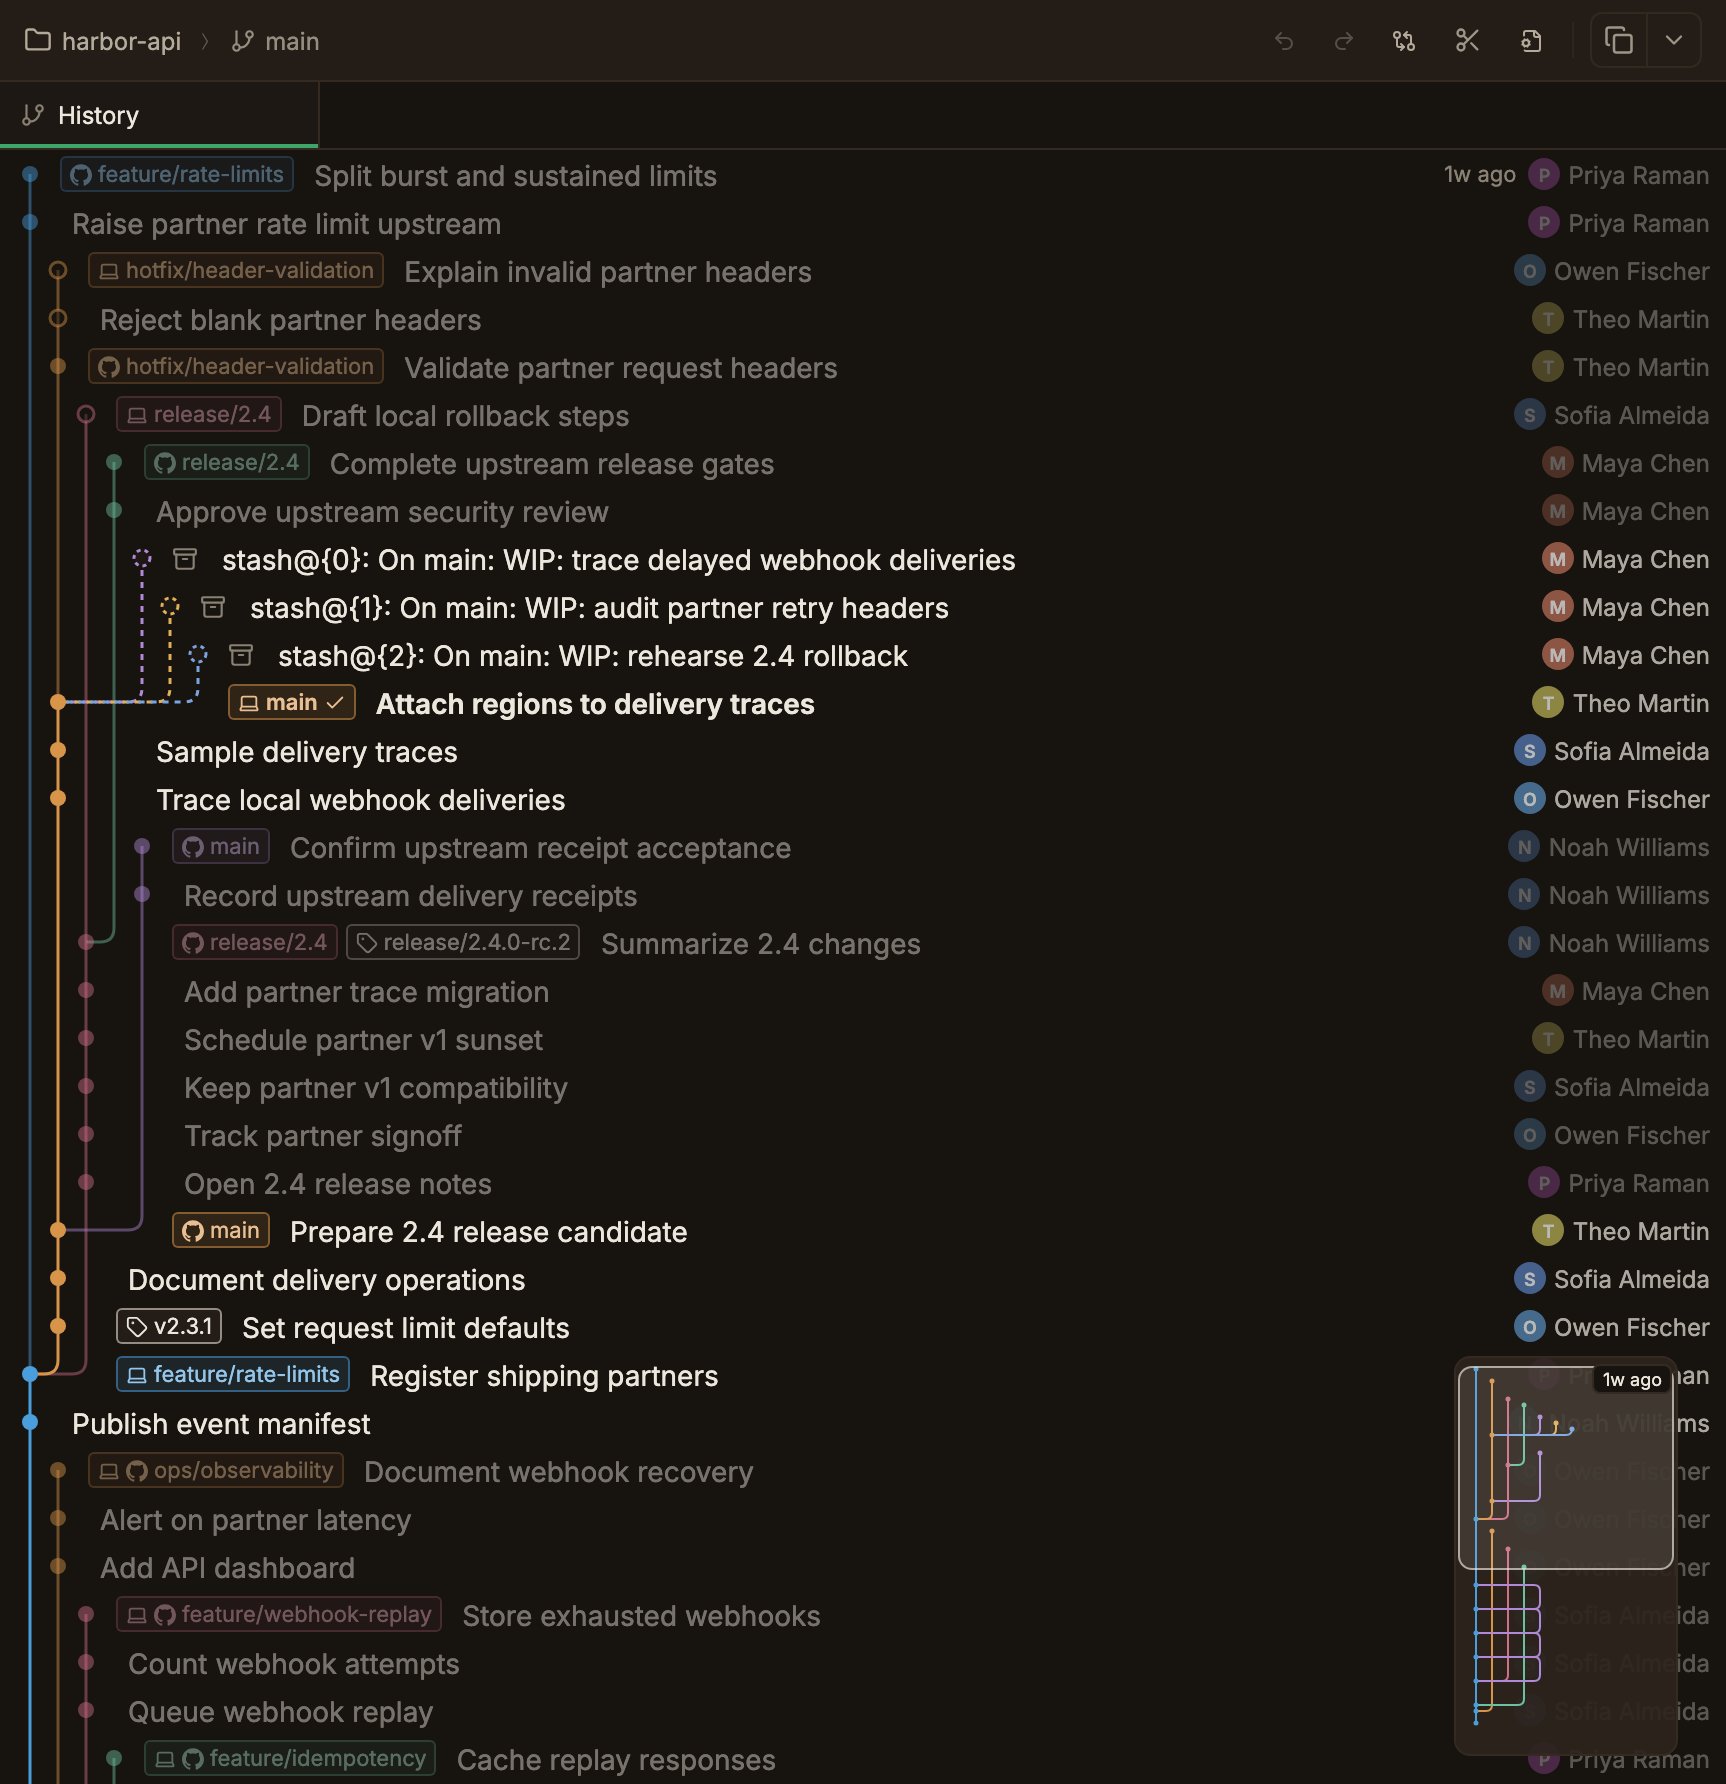
Click an item once in the left-hand list and the graph scrolls to and selects the matching node.
Select the node and the right sidebar shows the list of changed files it contains; pick a file and its diff opens.