

Where to start
- The Create pull request button sits after Push, Pull, Fetch, and Stash in the right sidebar header. The head branch is the current branch.
- Create pull request… is in the local branch’s submenu when you right-click a commit in the graph. The head branch is that branch.
The Create Pull Request dialog
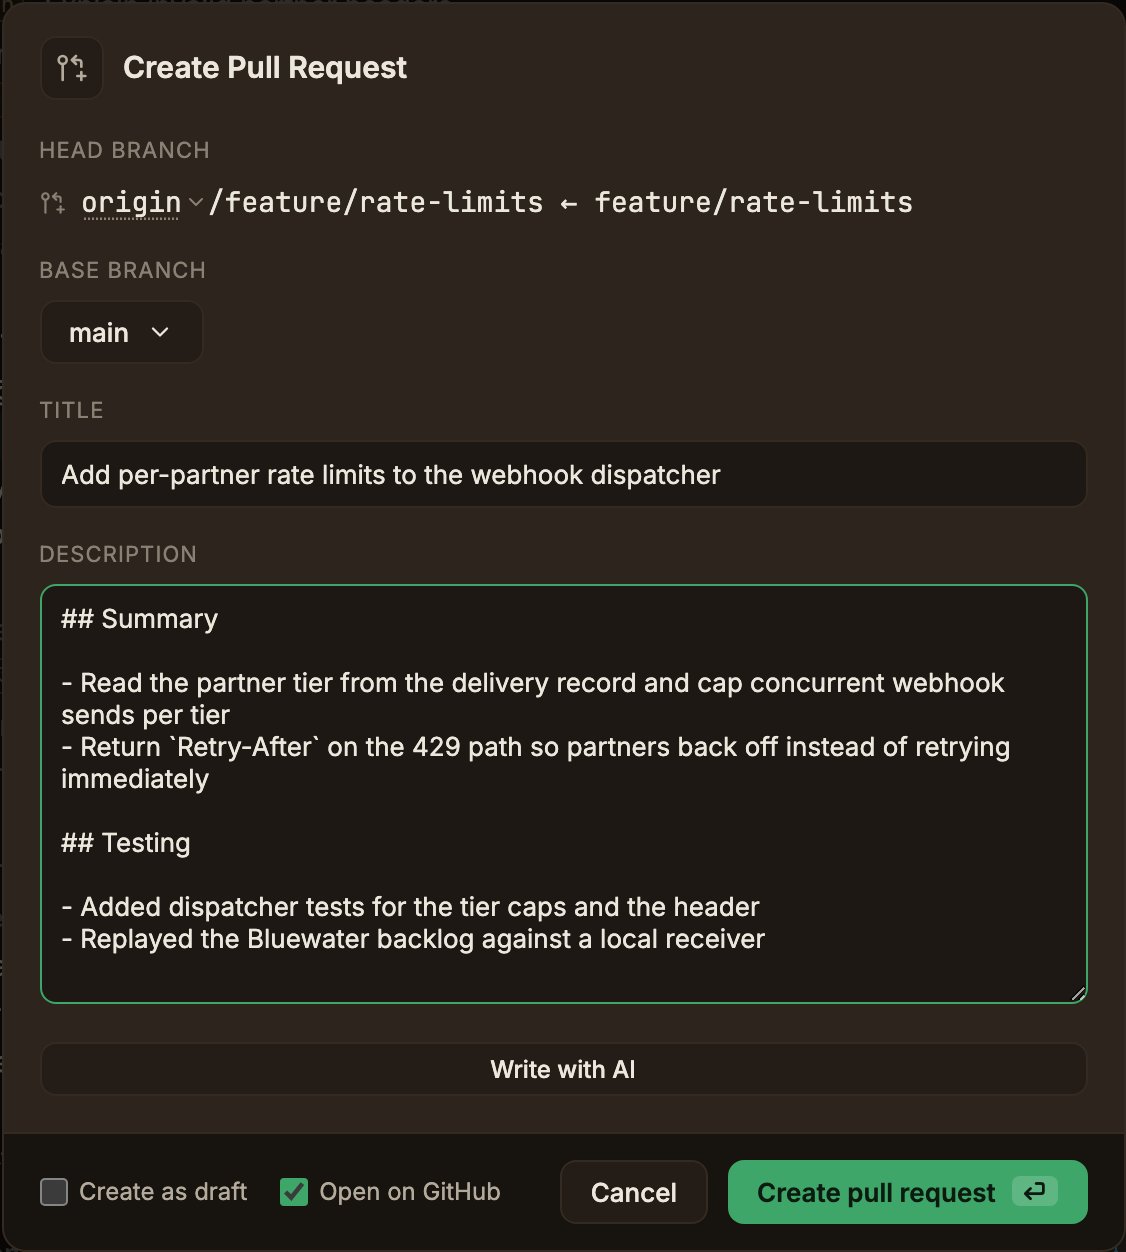
1
Pick the base branch
Head branch is the branch you opened the dialog from.
Base branch lists the repository’s default branch first, then the branches of the selected remote.
2
Write the title and description
Type into Title and Description, or click Write with AI.
Only the title is required.
3
Create it
Turn on Create as draft or Open on GitHub as you like, then click Create pull request.
If the branch is missing on the remote, it’s pushed first.
Writing with AI
Write with AI runs the Claude Code CLI installed on your computer and fills in Title and Description from the branch’s changes. The CLI runs on your computer and uses your own Claude Code sign-in. Edit the result as you like, or click Rewrite with AI for another attempt. If you close the dialog while a draft is running, a toast asks you to confirm with Cancel and close.Settings → ParalleLane → AI
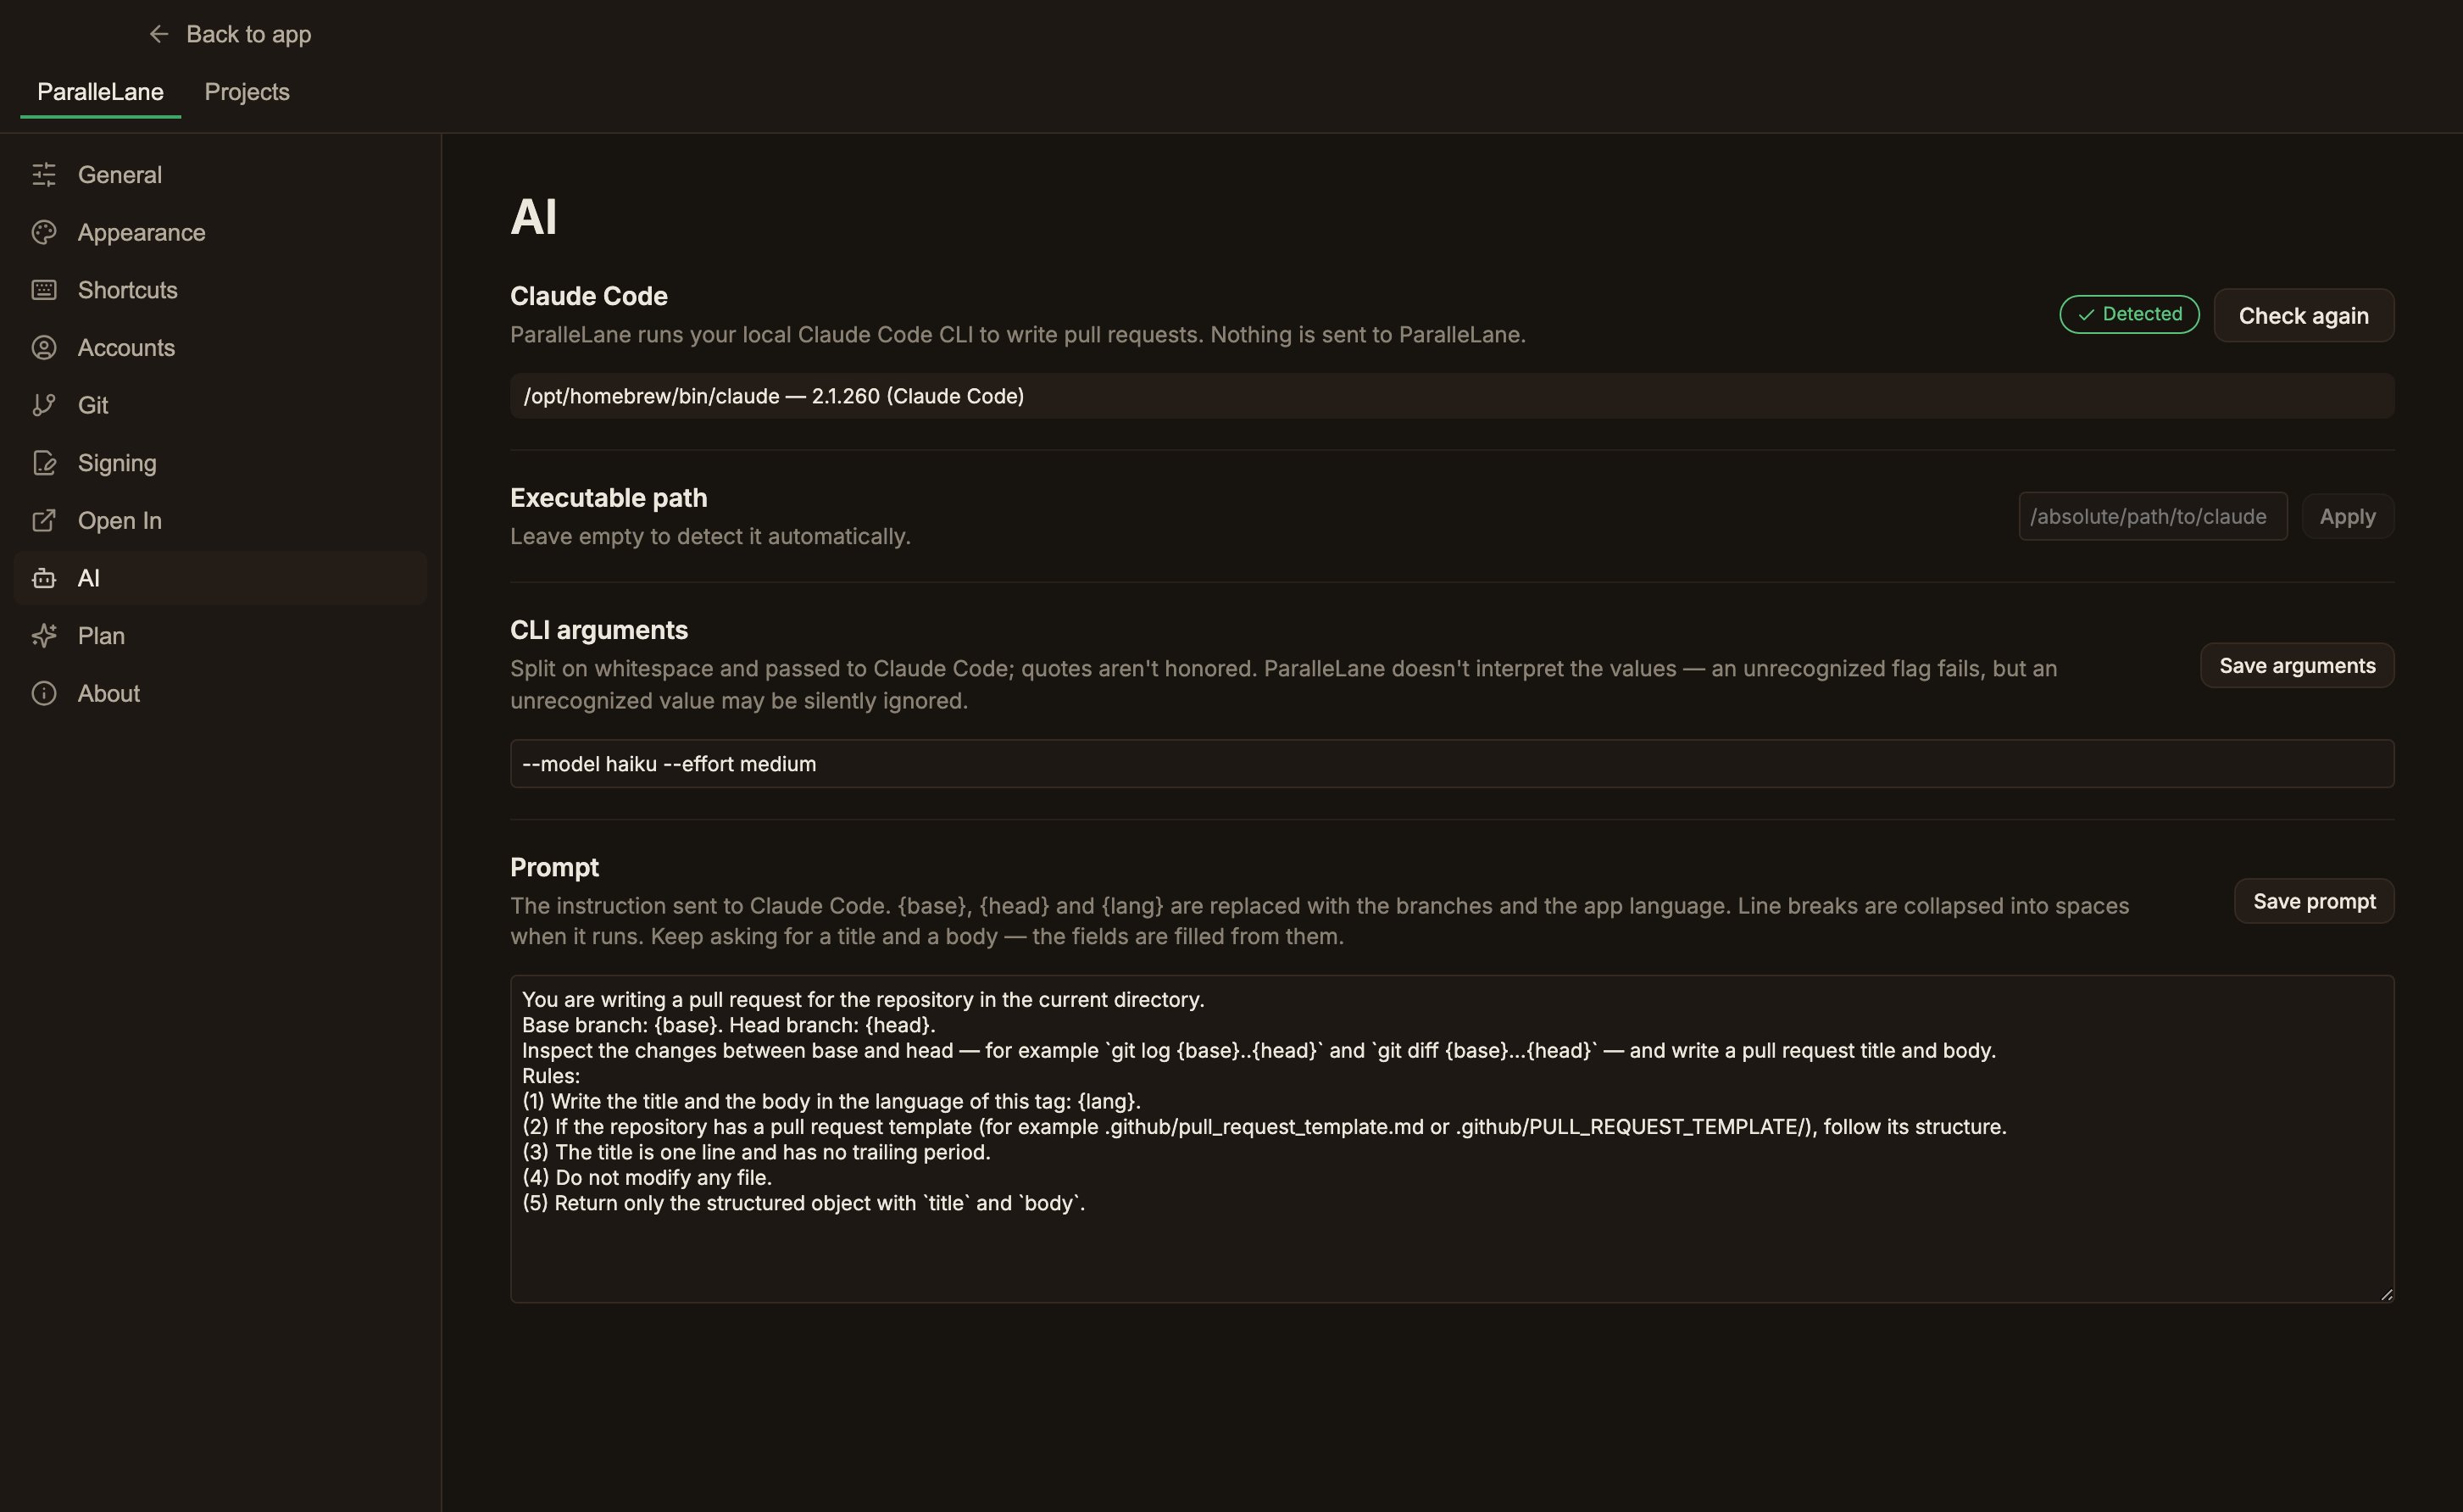
Changes apply to the next draft.